1. Getting Started
Why Grady?
Below is a list of reasons to use Grady. If at least one applies to you, then Grady is right for you.
- You don't drive or you don't feel like driving to the grocery store.
- You want to pay a reasonable service fee.
- You want to meet someone special close at home. Whether you're looking for your soulmate, new friends or just someont to talk to, Grady is right for you. The dating feature is optional and can be disabled.
- You may need driver's help carrring groceries into your home.
- You want to help save the earth and have a substainable lifestyle.
What you need
- Android 5 (or higher) phone with reliable WiFi internet connection.
- Keep your Google account signed-in on the device while using the app
- The phone is equipped with a working mobile phone number
Initial Setup
- Download and install Grady app from the Google Play Store
- Complete your settings at your earliest convenience which is required before you can do anything useful.
- e-Transfer setup: This is one of two methods you pay delivery fees to the Drivers (the other method is cash). Log into your bank's website and create a new e-Transfer payee using Driver's name and Gmail address (Once you accept a bid, Driver's email address will appear).
- Create a new contact Grady (Grady@deedeegroup.com) to your contact list to ensure important email to you will be sent to your inbox.
How it works
- You create an order by tapping the + sign on the main page.
- Specify which supermarket you want to go to. If the supermarket doesn't exist yet, create it.
- Budget: The max amount the driver will pay at the checkout. More detals about the Budget:
- Driver will stop picking more items as soon as the estimate reaches the budget. Therefore you should provide enough budget if you don't want partial order completed.
- You're responsible to pay the exact amount on the receipt provided by the Supermarket, even though the amount is a little higher than the budget, due to human errors.
- Your initial offer of the service fee, the amount you're willing to pay for the one-stop shopping & delivery service. Nearby Drivers can accept your offer, bid higher or lower.
- Payment method selection
- Cash: You pay both the amount on the supermarket receipt and the service fee with cash upon delivery.
- e-Transfer: You use your bank's website or mobile app to pay the money.
- Delivey date and time: 2-hour delivery window starting time. Someone needs to be available to receive the grocery delivery during this 2-hour period.
- Save the pending order.
- Add grocery items to the order: Select show order items and tap +
- Post the order: You need to post the order so that drivers nearby can see it and bid on it.
- Grady Drivers nearby compete against each other to bid on your Order. Once you receive at least one bid, long-tap an order, and select Bid Manager from the popup menu
- You then pick a driver based on his/her personal data and what kind of people you want to meet as well as the bidding amount. The Order will become Accepted.
- Get ready to receive the delivery
- Someone would be home during the 2-hour delivery window
- If you pay the fee with E-transfer, it takes sometime for the money to arrive at Driver's account, therefore you're advised to send the payment to Driver's Gmail address before driver's arrival, if he/she sends the exact amount on the supermarket's receipt. The amount you owe is the receipt amount plus the service fee.
- Unloading from Driver's vehicle. By default, driver will leave everthing at your front door unless you've requested assistance to carry groceries into your home
- Review the driver. You can write a review about the driver based on your experience, if you wish.
- Block the driver. If you're not happy with the service and don't want the Driver to see your future Orders, block him/her.
2. Settings
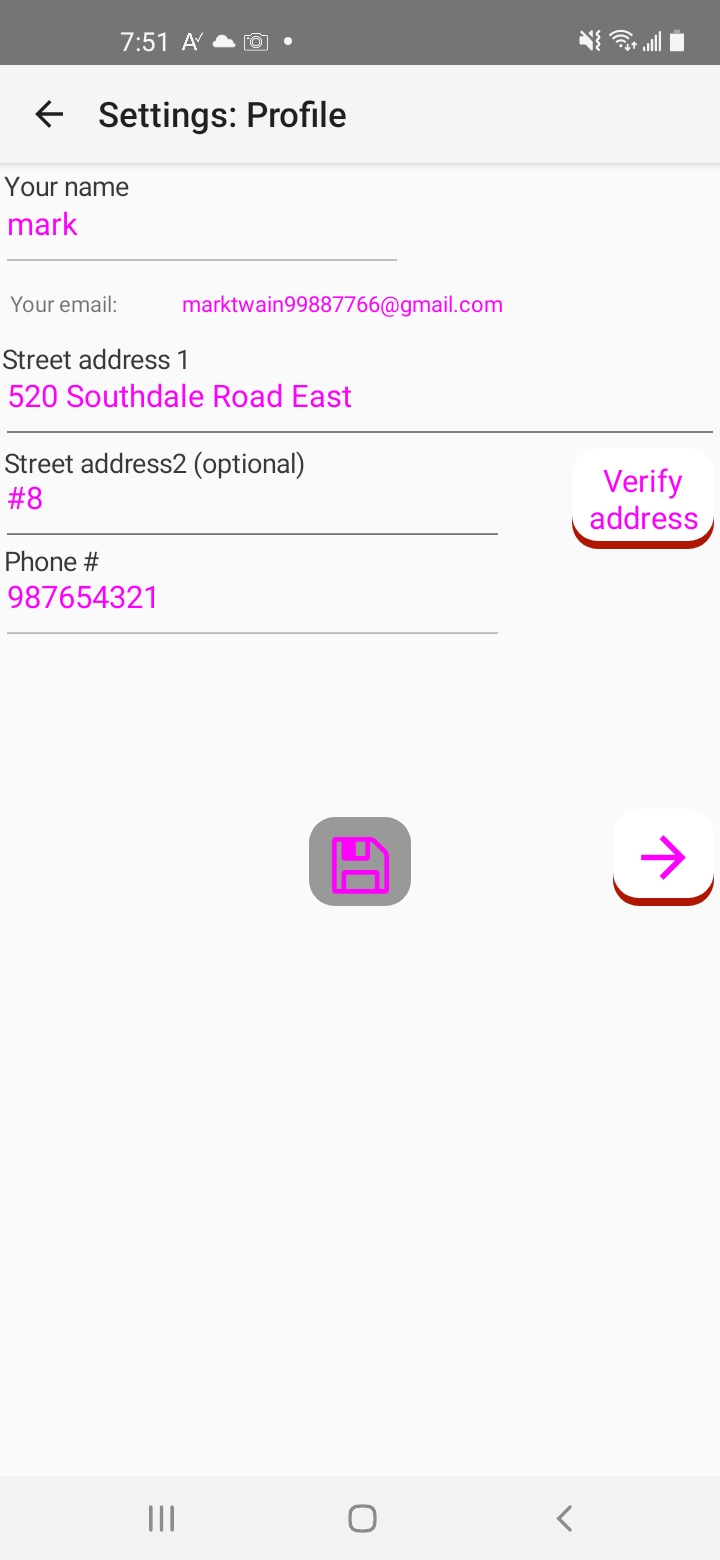
Profile
- Name: Your name
- Street Address 1: The street address where you're located. For example, 123 Main Street.
- Street Address 2(optional): This is where you put additional information, such as building name, unit # or door bell #, etc.
- Cell #: Your cell phone number
To save changes, first tap Verify address and Map will popup showing your location; verify that everything is correct, and tap Back key to return here. Correct your address if there is some error, otherwise, tap Save button to save it.
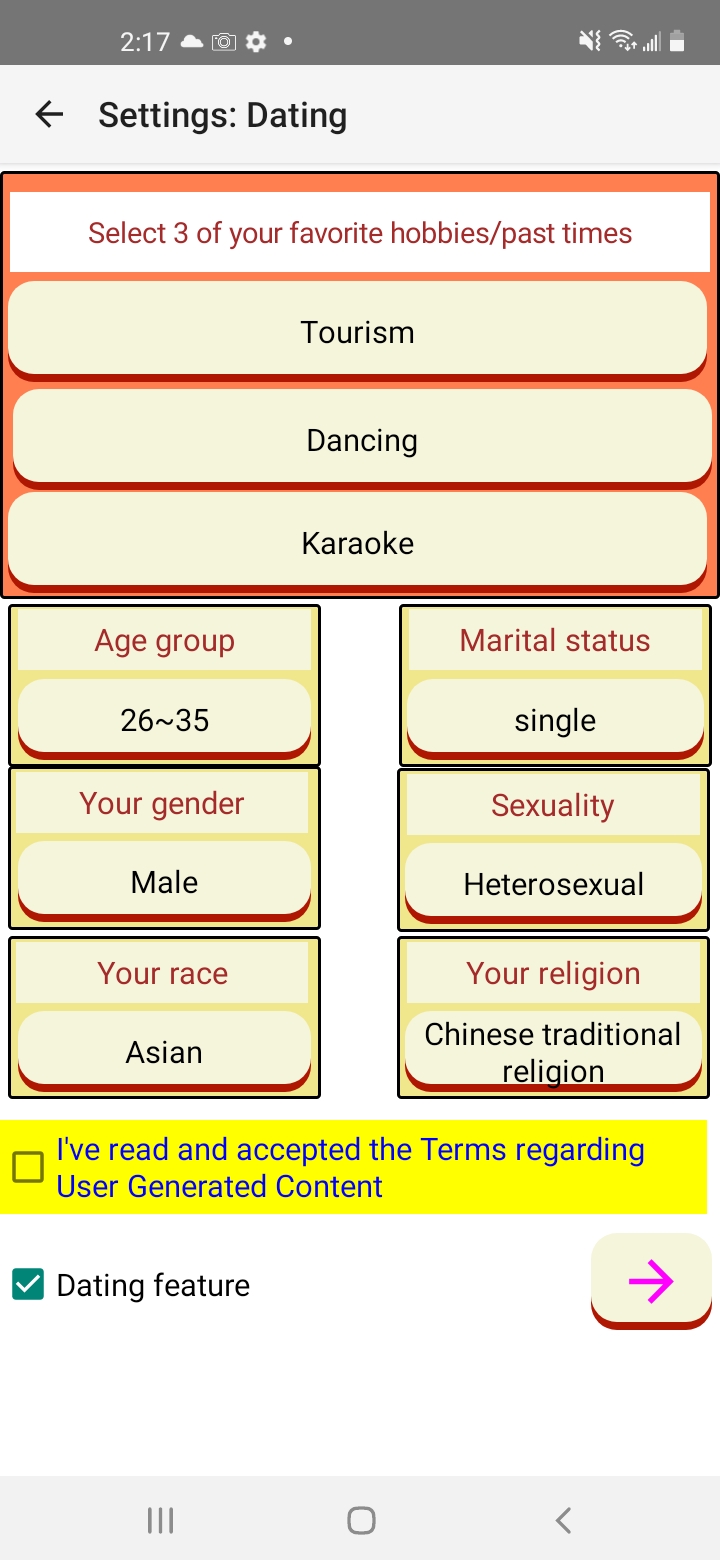
Dating feature
- This is an optional feature that can be disabled, if you wish, by unchecking the "Dating feature" checkbox (see picture to the right). Once disabled, you can only interact with members who have also disabled it. You can enable/disable the feature whenever you want.
- Hobbies: You'll need to provide your top 3 favorite hobbies
- You'll also select your age group, gender, marital status, sexuality, race and religion
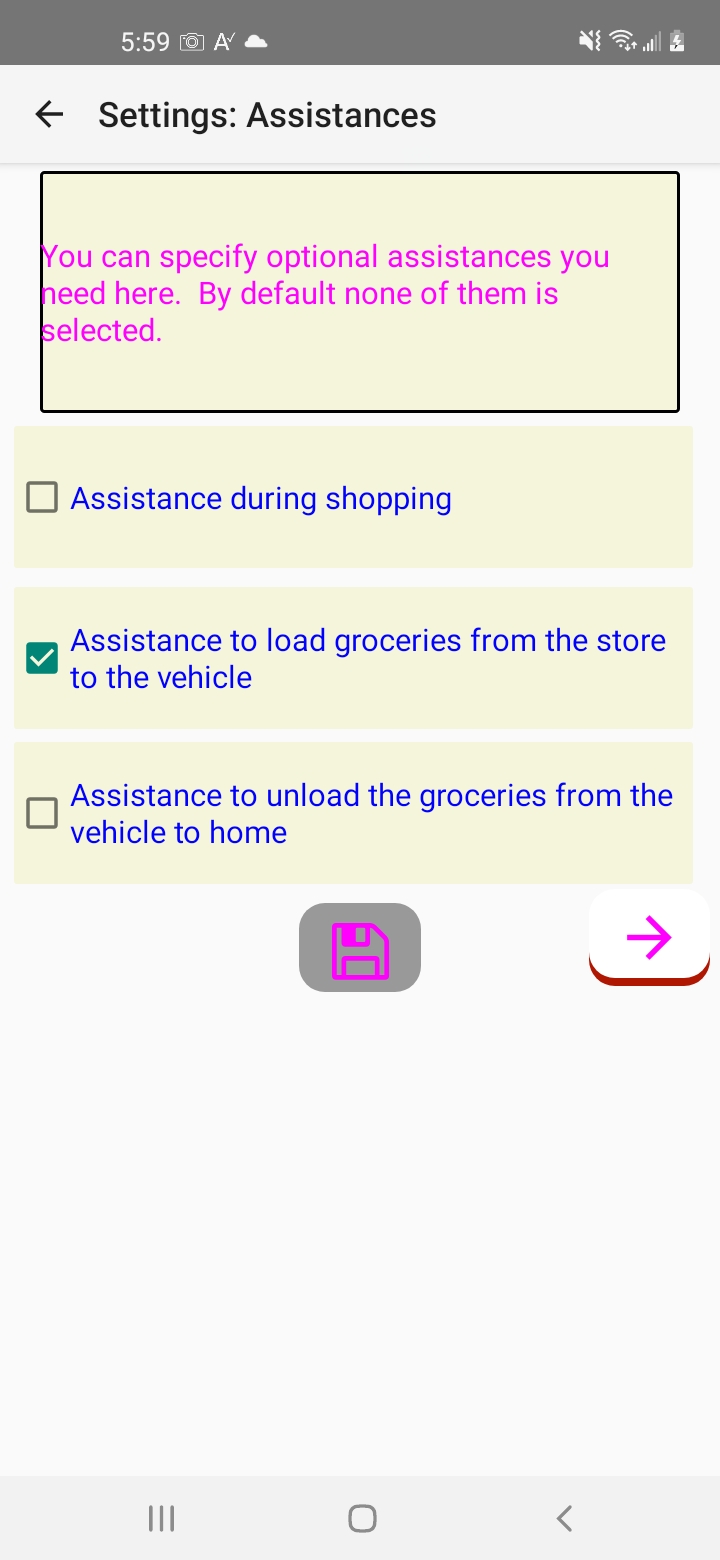
Assistances (optional)
Assistance to carry groceries into your home: Check it if you want Driver to help you carry your groceries to anywhere in your home.
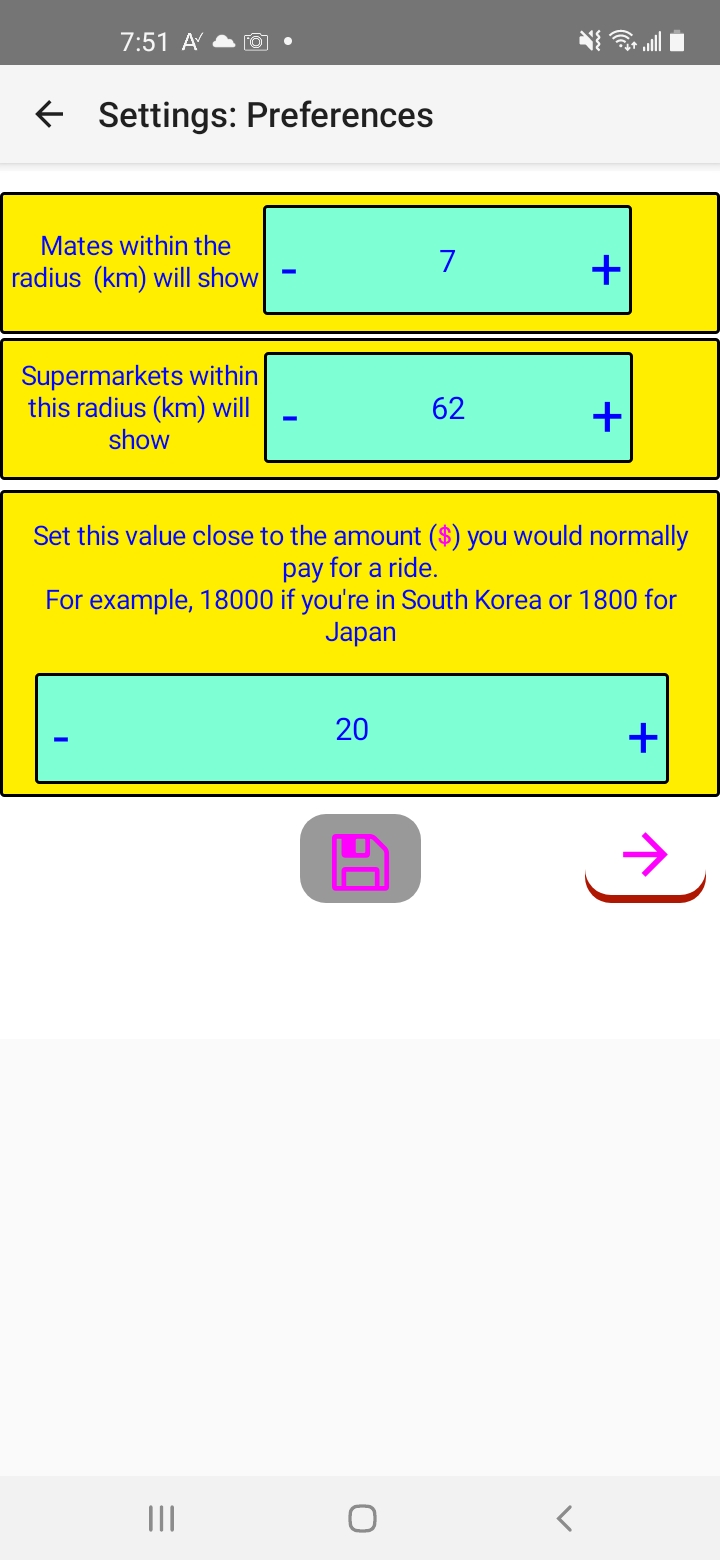
Preferences
- Mate radius: Changing the radius will affect the number of your nearby mates. Every mate within this radius is considered nearby.
- Supermarket radius: This option applies to Orderrs. All existing supermarkets on the system within this radius will appear when you select a supermarket.
- Average order fee you pay: This will be the fee suggested for you when you add a new order and you can change it.
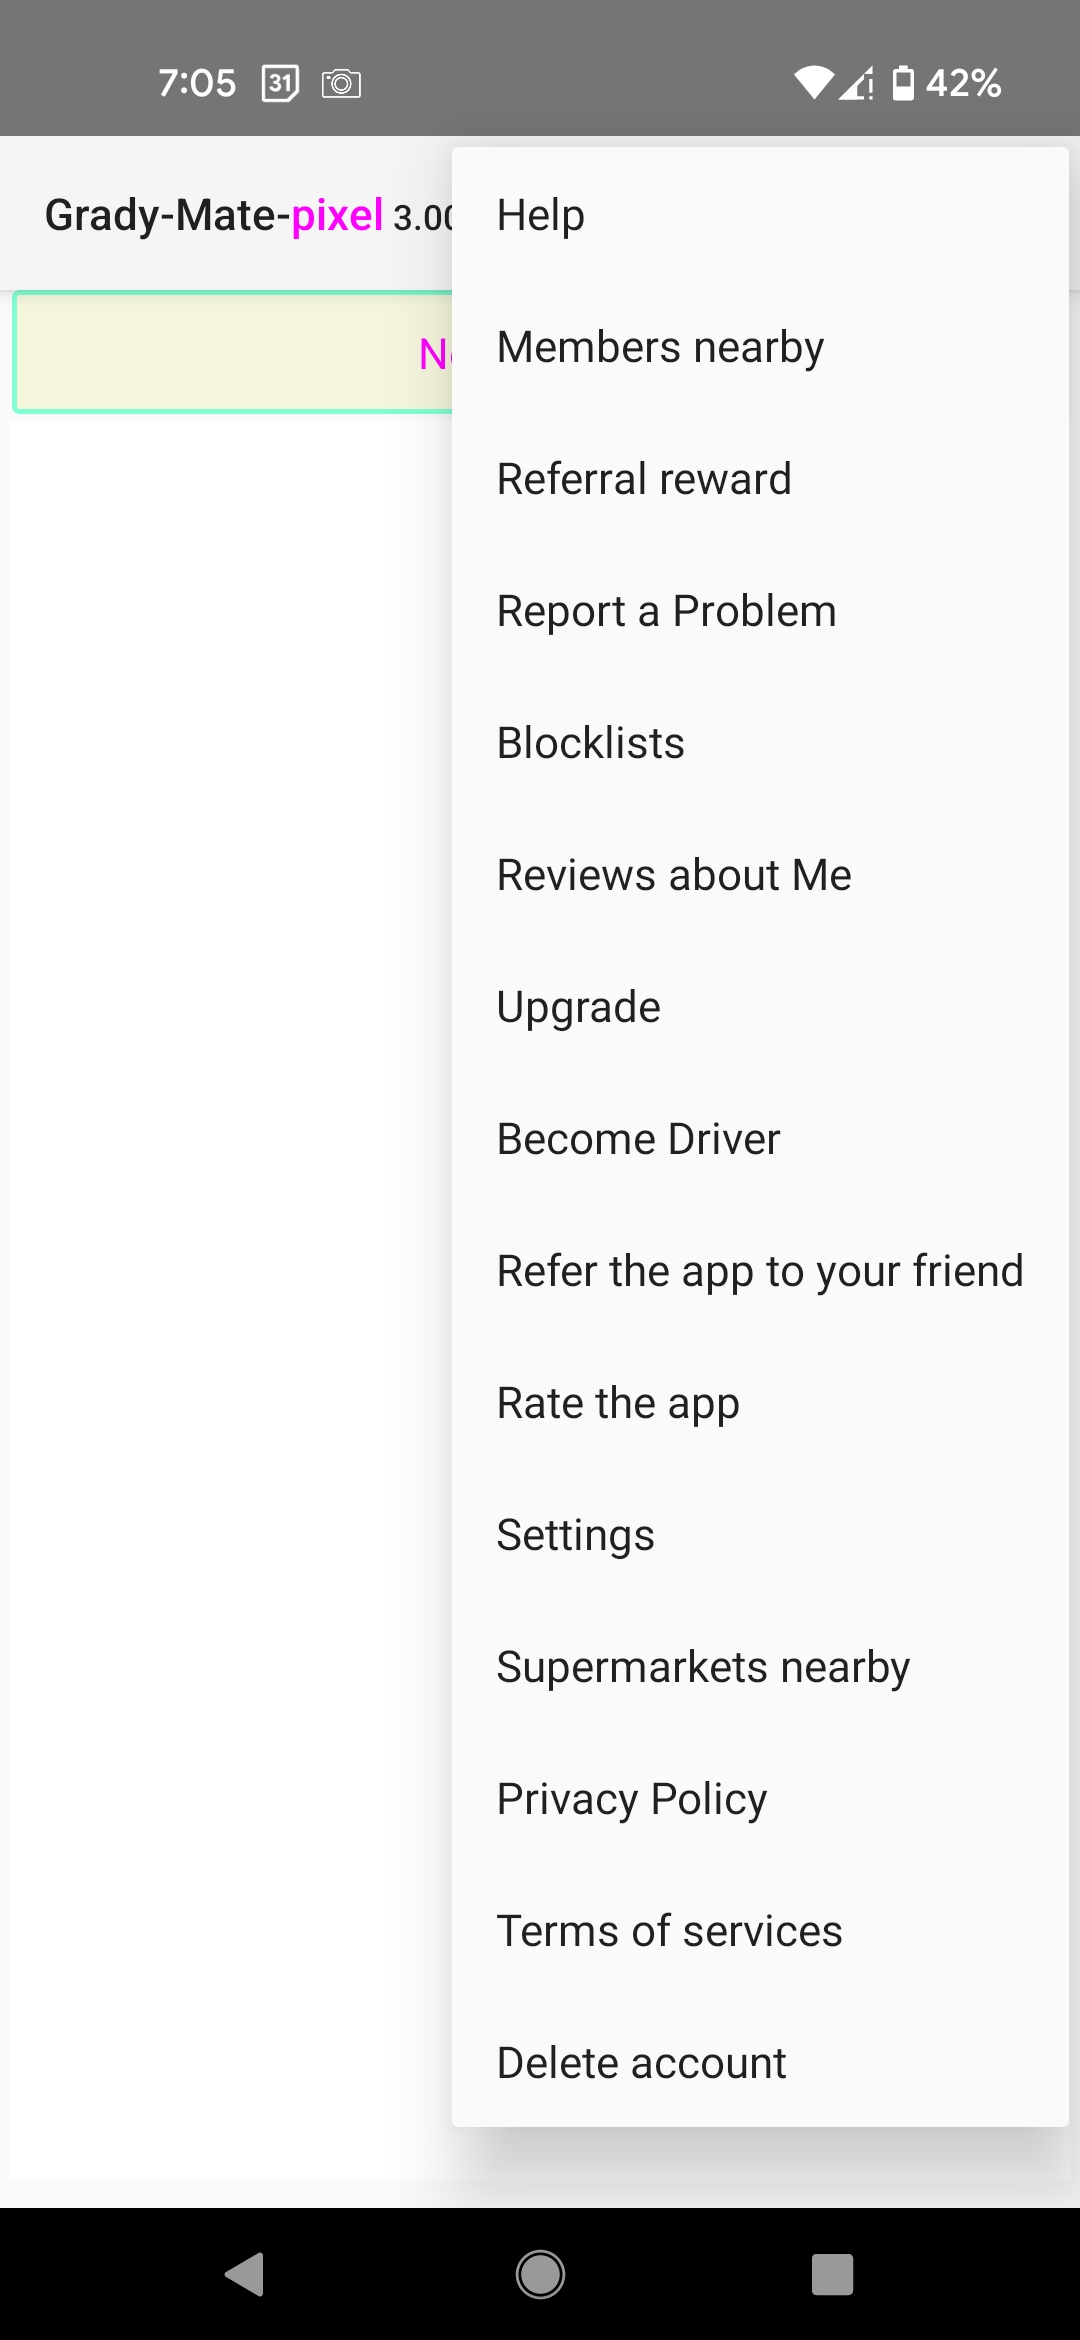
3. Main Menu
- Add a new order: You add a new order by tapping the + sign on the title bar.
- Referral reward: To claim your rewards and to view a list of your referrals.
- Report a problem: This is where you can report a problem of any kind, suh as violation of the Terms of services, any error in User Generated Contents.
- Blocklists: A list of mates you have blocked and a list of mates who have blocked you.
- Reviews about me: It shows all ratings about you.
- Refer the app to a friend: If you like to app and want some of your friends to use it, simply select this option and provide their email address.
- Supermarkets nearby: Google maps will show supermarkets near you.
- Settings: This is where the Settings, including Profile and Personal, are located.
- Mates nearby: It shows a list of nearby mates with closest on top. Changing the Mate Radius in the Preferences Settings will affect the number of mates returned.
- Upgrade: To upgrade to the Pro Edition to have unlimited Orders.
- Become Driver: It enables you to become a Driver easily. Make sure to complete Orders in-progress or cancel them first.
- Rate the app: You can rate the app without leaving it and going to the Google Play store.
- Delete account: It allows you to delete your account immediately as long as there is no order that is associated with your account.
4. Order Management
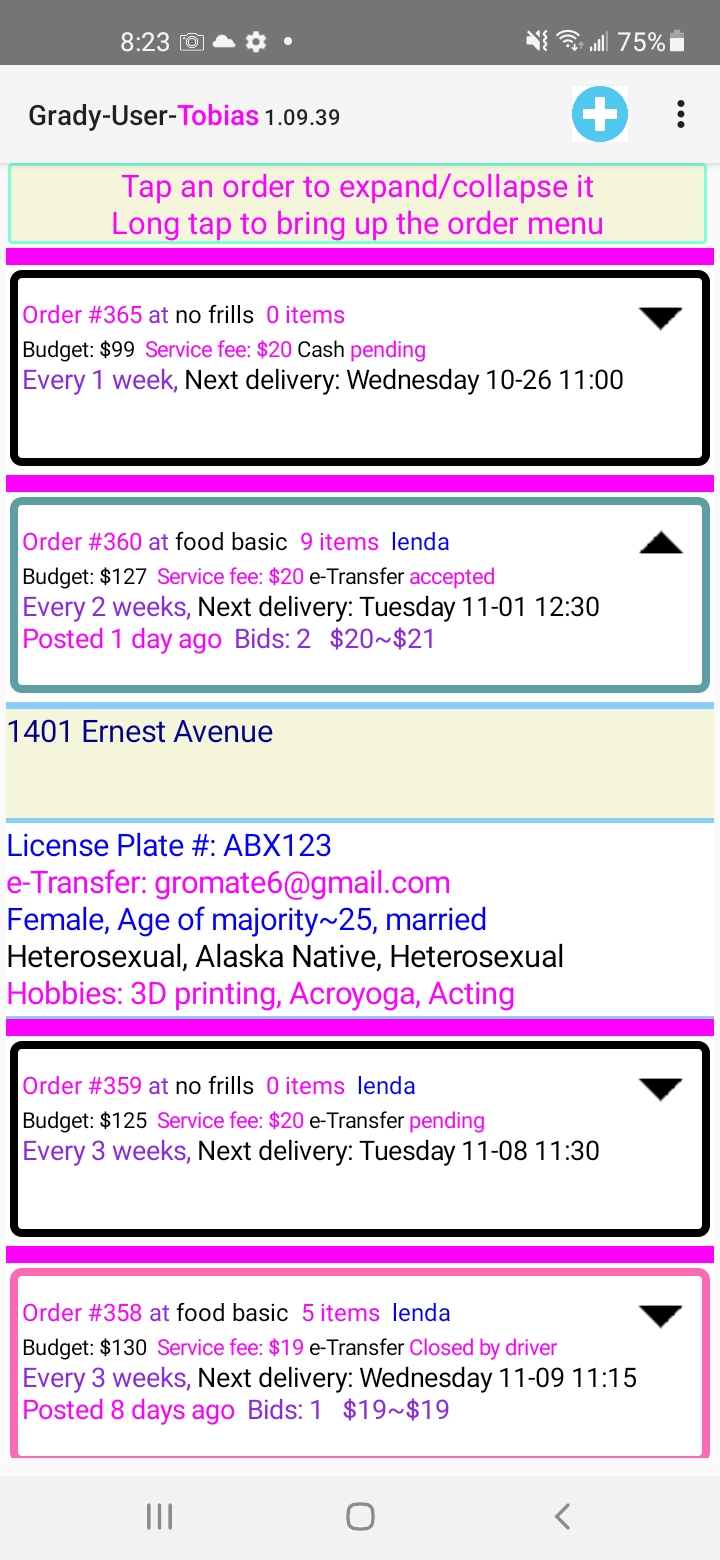
Mate Main page
It shows a list of your Orders, each listing consists of
- Summary
- Supermarket name
- Order#
- Offer: Your initial amount of offer if not accepted yet; otherwise the winning bid and the amount you will pay for the Order.
- Order status
- Pending: This is when you can add items to your order or remove any of them. Hidden from drivers. You need to post the order so that drivers can bid on it.
- Requested: No bid yet
- Offered: One of more drivers have placed a bid
- Offered by you: You're one of the bidders
- Accepted: You've accepted a bid
- Paused: The Orderis put on hold temporarily
- Resumed: The Orderhas been resumed after being paused
- Closed by Driver: Your Driver has closeed the order
- Closed by you: You have closed the order.
- Mate no-show: Driver arrived on time to pick you up, but you didn't show up.
- Driver no-show: Driver didn't come to pick you up at the specified date and time.
- The Date and Time of the delivery. The delivery window is 2 hours starting from the time shown. For example, if the delivery date and time is 2023-06-20 15:30, you need to ensure that someone will be at the specified address between 15:30~17:30.
- Bidding info: Number of bids you've received so far and the minimum and maximum of the bids.
- Order details. Tap the summary to show the details, if hidden.
- Supermarket address
You'll see following additional info once you've accepted a bid
- Driver's vehicle's license plate number. You can verify this number.
- Driver's email address: This is the gmail address for you to pay your Driver via e-Transfer.
- Driver's personal data if Dating feature is enabled.
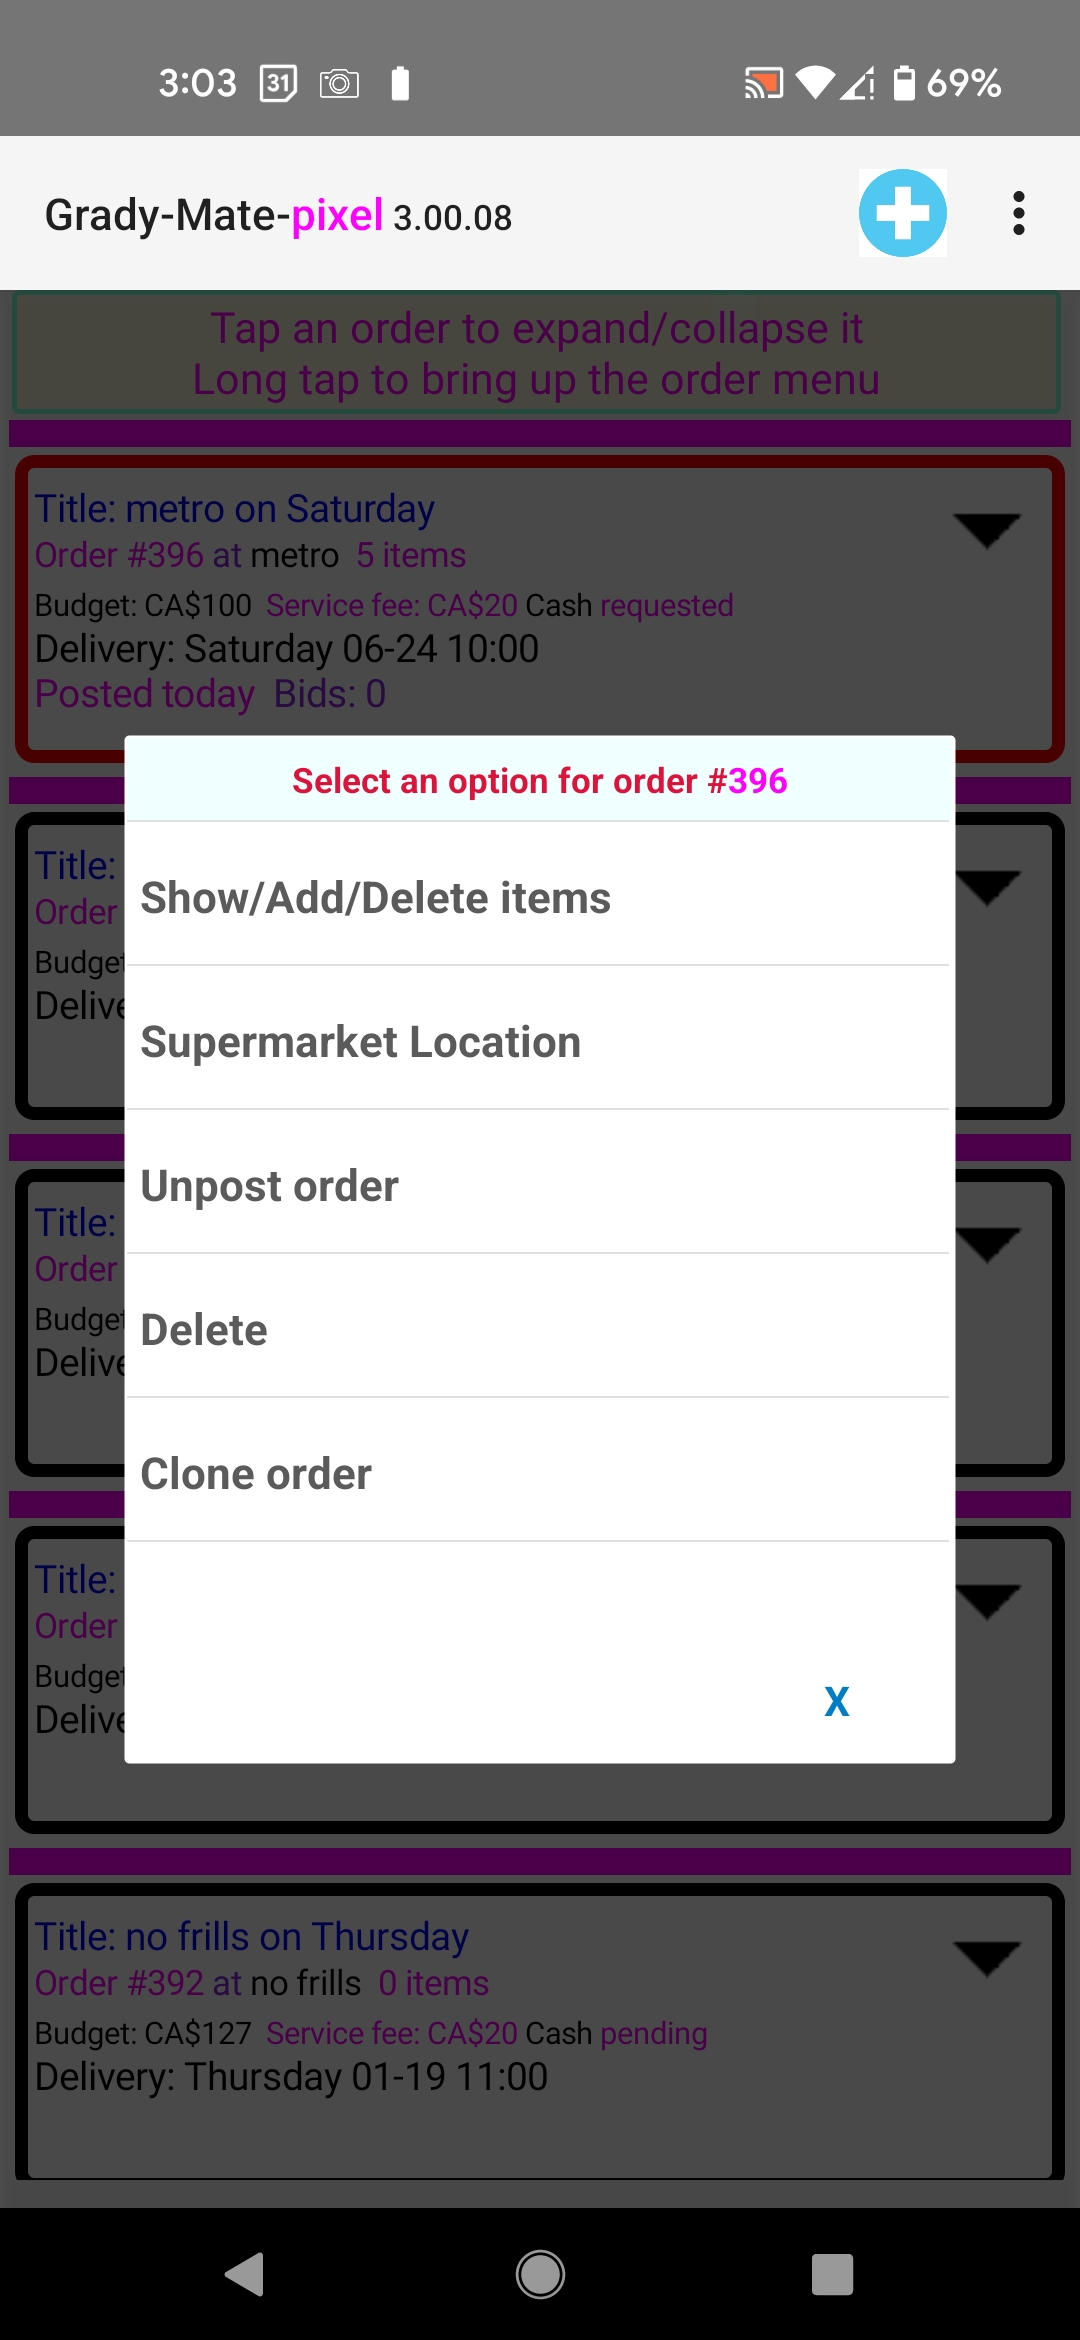
Long tap an order to see the order menu.
- Post order: Post the pending order so that drivers can bid on it.
- Bid Manager: Once your order receives one or more bids, you can open up the Bid Manager to accept a bid. The selected bidder will be your Driver.
- Supermarket location
- Delete: You can delete your order as long as it hasn't received any bid yet.
- Accept: Once your order has received some bids, you can accept one of them if you wish.
- Pause: You can pause an accept order as long as it's not within 1 hour before the scheduled Ordertime.
- Resume: You can resume an order paused by you earlier as long as it's not within 1 hour before the scheduled delivery time.
- Close: You can close an accepted order as long as it's not within 1 hour before the scheduled Ordertime.
- Call or text Driver: You can call or text your driver of your accepted Orders
- Driver no show: When the Driver doesn't come in time, give him/her a call. Once confirmed that the driver is not coming, mark "Driver no show".
- Review the Driver: You can rate the Driver of accepted Orders.
- Block the Driver: You can block the Driver of an accepted order. Blocked Drivers can't see your future orders.
Bid Manager
- It shows a list of bids you've received so far.
- You decide which bid to accept. The selected bidder will be your Driver.
- The order will enter "Accepted" state once you accept a bid.
3. New Order
Steps to add a new Order
- Tap New Order("+" sign)
- Tap "Select a supermarket" to select an existing supermarket or add a new one. Steps to add a new supermarket:
- Tap + sign to bring up the New Supermarket page
- Enter supermarket name
- Check Other city/town, same state/province if you live near the city/town boundary and it's located in a different city/town than yours.
- Check Other state/province if you live near the State/province boundary and it's located in a different state/province than yours.
- Supermarkets nearby show nearby supermarkets on Google Maps. Tapping a listing and its address will appear.
- Address: Enter the address following the onscreen interactive instruction.
- Check the address to make sure that there is no error by tapping the checkmark button.
- Tap Save to create the new supermarket, then the app will take you back to the new Order page.
- Your initial offer: This is the amount you're willing to pay for the round-trip Order. Drivers can bid higher or lower than this amount.
- Delivery date: This is the date you'll receive the delivery.
- Delivery start hour: A 2-hour delivery window starting time. You need to ensure that someone will be available during the delivery window at the specified address.
- Save the new Order: Tap the save button and you'll see the final confirmation. Tap OK to continue or X to cancel.

Copyright © 2018-2024 deedeegroup© Privacy Policy Terms of services