Gromate Rider Guide

Gromate logo


1. Getting Started


Why become a Gromate Rider?

Below is a list of reasons to be a Gromate Rider. If at least one applies to you, then Gromate is right for you.
  1. You do grocery shopping weekly most of the time.
  2. You want to meet someone special closed at home. You don't meeting meeting people online where people can fake their identity. Whether you're looking for your soulmate, new friends or just someont to talk to, Gromate is right for you.
  3. You don't drive or you don't feel like driving to the grocery store.
  4. You want to know the exact fee you'll pay to the Driver before accepting a bid
  5. You prefer one-stop service: Gromate Driver picks you up at your home at the time you've specified, takes you to the grocery store and drops you off at your home.
  6. You hate to book a taxi twice and dislike long waits for the unreliable taxi to arrive
  7. You trust your people nearby more than random strange taxi drivers who are quite often not helpful nor friendly.
  8. You prefer picking your own groceries for freshness and to get exactly what you want.
  9. You need help at the grocery store or loading your groceries into the vehicle or unloading them to your home from the vehicle.
  10. You want to help save the earth, the one and only planet we can call home now and in the distant future.

What you need

  1. Android 5 (or higher) phone with reliable WiFi internet connection.
  2. Keep your Google account signed-in on the device while using the app
  3. The phone is equipped with a working mobile phone number

Initial Setup

  1. Download and install Gromate app from the Google Play Store
  2. Complete your settings at your earliest convenience which is required before you can do anything useful.
  3. e-Transfer setup: This is one of two methods you pay ride fees to the Drivers (the other method is cash). Log into your bank's website and create a new e-transfer payee using Driver's name and Gmail address (Once you accept a bid, Driver's email address will appear).
  4. Create a new contact Gromate (gromate@deedeegroup.com) to your contact list to ensure important email to you will be sent to your inbox.

How it works

  1. You create a ride
    1. Specify which supermarket you want to go to. If the supermarket doesn't exist yet, create it.
    2. Select the Start date time, when Driver will pick you up the first time. Subsequent rides will take place at same time each week.
    3. Your initial offer. How much you're willing to pay for the one-stop service. Nearby Drivers can accept your offer, bid higher or lower.
  2. Gromate Drivers nearby compete against each other to bid on your ride. Once you receive at least one bid, long-tap a ride, and select Bid Manager from the popup menu
  3. You then pick a driver based on his/her personal data and what kind of people you want to meet as well as the bidding amount. The ride will become Accepted.
  4. Get ready to be picked up.
    1. Prepare some reusable grocery bags to bring with you
    2. If you pay the fee with E-transfer, it takes sometime for the money to arrive at Driver's account, therefore you're advised to send the payment to Driver's Gmail address before the pickup time.
  5. Pickup time. At the specified date and time, the Driver will come to pick you up. Each week, your driver will pick you up at the same time.
  6. At the supermarket, Driver will help you with your shopping if you request "during shopping" assistance.
  7. Loading to Driver's vehicle. Driver will help you if you've specified "Loading assistance"
  8. Drop off time
    1. Driver will help you carry your grocery into your home if you've selected "Unloading assistance"
    2. If you pay the fee in cash, it's time for you to pay the Driver now.
  9. Review the driver. You can write a review about the driver based on your experience, if you wish.
  10. Block the driver. If you're not happy with the service and don't want the Driver to see your future rides, block him/her.
  11. Terminate the ride if you don't want the weekly ride any more.


2. Settings


Profile

  1. Name: Your name
  2. Street Address 1: The street address where you're located. For example, 123 Main Street.
  3. Street Address 2(optional): This is where you put additional information, such as building name, unit # or door bell #, etc.
  4. Cell #: Your cell phone number
To save changes, first tap Verify address and Map will popup showing your location; verify that everything is correct, and tap Back key to return here. Correct your address if there is some error, otherwise, tap Save button to save it.
Profile settings

Dating feature

  1. This is an optional feature that can be disabled, if you wish, by unchecking the "Dating feature" checkbox (see picture to the right). Once disabled, you can only interact with mates who have also disabled it. You can enable/disable the feature whenever you want.
  2. Hobbies: You'll need to provide your top 3 favorite hobbies
  3. You'll also select your age group, gender, marital status, sexuality, race and religion
Dating settings

Assistances (optional)

  1. Assist shopping: Check this if you need any kinds of help while shopping in the store.
  2. Assist loading: Check it if you need help loading grocery from the store to the car.
  3. Assist unloading: Check it if you want Driver to help you unload your groceries from the car and carry them into your home.
Assistances settings

Preferences

  1. Mate radius: Changing the radius will affect the number of your nearby mates. Every mate within this radius is considered nearby.
  2. Supermarket radius: This option applies to Riders. All existing supermarkets on the system within this radius will appear when you select a supermarket.
  3. Average ride fee you pay: This will be the fee suggested for you when you add a new ride and you can change it.
Preferences


3. Main Menu


  1. Add a new ride: You add a new weekly ride by tapping the + sign on the title bar.
  2. Referral reward: To claim your rewards (1 monthly free ride per referral) and to view a list of your referrals.
  3. Report a problem: This is where you can a problem of any kind, suh as violation of the Terms of services, any error in User Generated Contents.
  4. Blocklists: A list of mates you have blocked and a list of mates who have blocked you.
  5. Reviews about me: It shows all Drivers' ratings about you.
  6. Refer the app to a friend: If you like to app and want some of your friends to use it, simply select this option and provide their email address.
  7. Supermarkets nearby: Google maps will show supermarkets near you.
  8. Settings: This is where the Settings, including Profile and Personal, are located.
  9. Mates nearby: It shows a list of nearby mates with closest on top. Changing the Mate Radius in the Preferences Settings will affect the number of mates returned.
  10. Upgrade: For users to upgrade to the Pro Edition to have unlimited rides.
  11. Become Driver: It enables you to become a Driver easily. Make sure to complete pending rides or cancel them first.
  12. Rate the app: You can rate the app without leaving it and going to the Google Play store.
  13. Delete account: It allows you to delete your account immediately as long as there is no ride that is associated with your account.
Rider Main page


4. Ride Management


Rider Main page

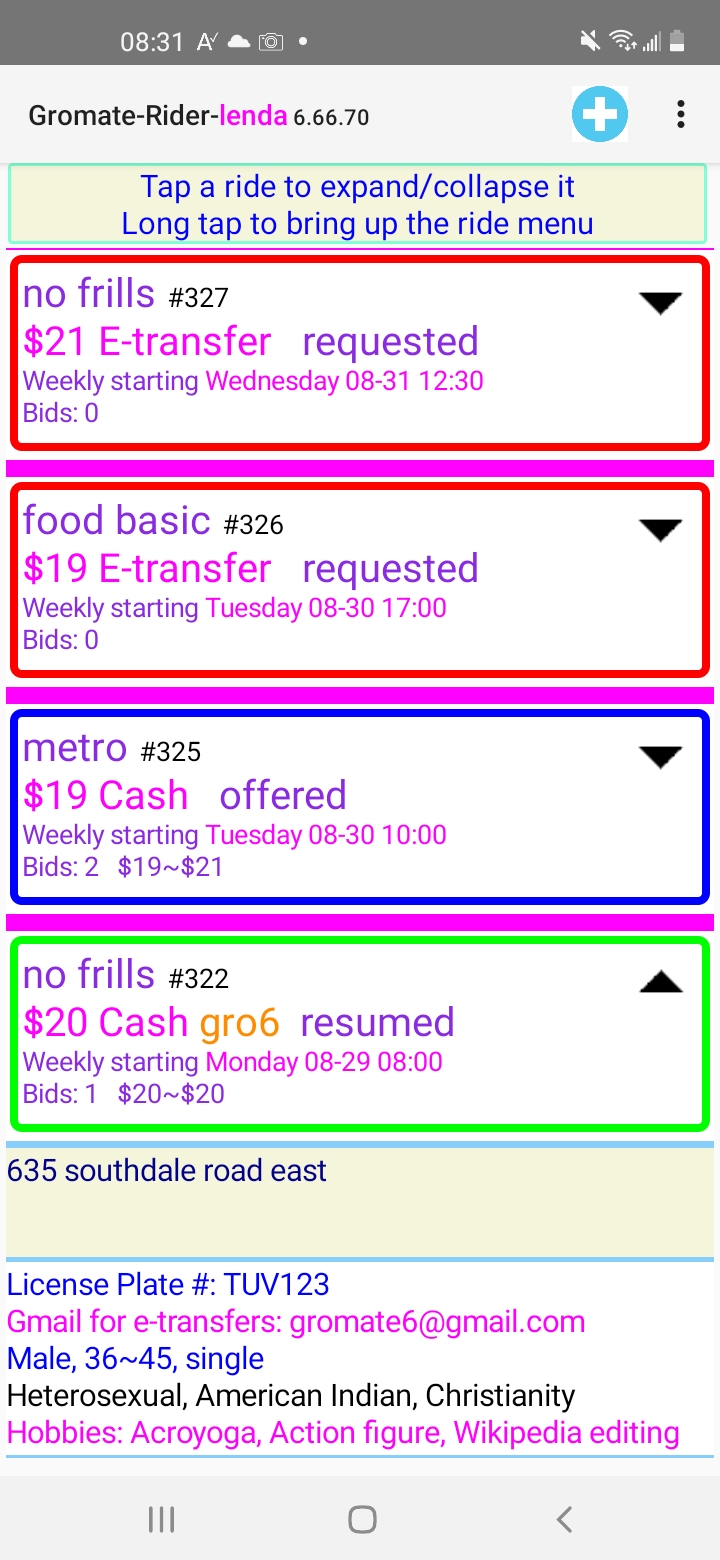
It shows a list of your rides, max 100. Each listing consists of
  1. Summary
    • Supermarket name
    • Ride #
    • Offer: Your initial amount of offer if not accepted yet; otherwise the winning bid and the amount you will pay for the ride.
    • Ride status
      1. Requested: No bid yet
      2. Offered: One of more drivers have placed a bid
      3. Offered by you: You're one of the bidders
      4. Accepted: You've accepted a bid
      5. Paused: The ride is put on hold temporarily
      6. Resumed: The ride has been resumed after being paused
      7. Terminated by Driver: Your Driver has terminated the ride
      8. Terminated by you: You have terminated the ride.
      9. Rider no show: Driver arrived on time to pick you up, but you didn't show up.
      10. Driver no show: Driver didn't come to pick you up at the specified date and time.
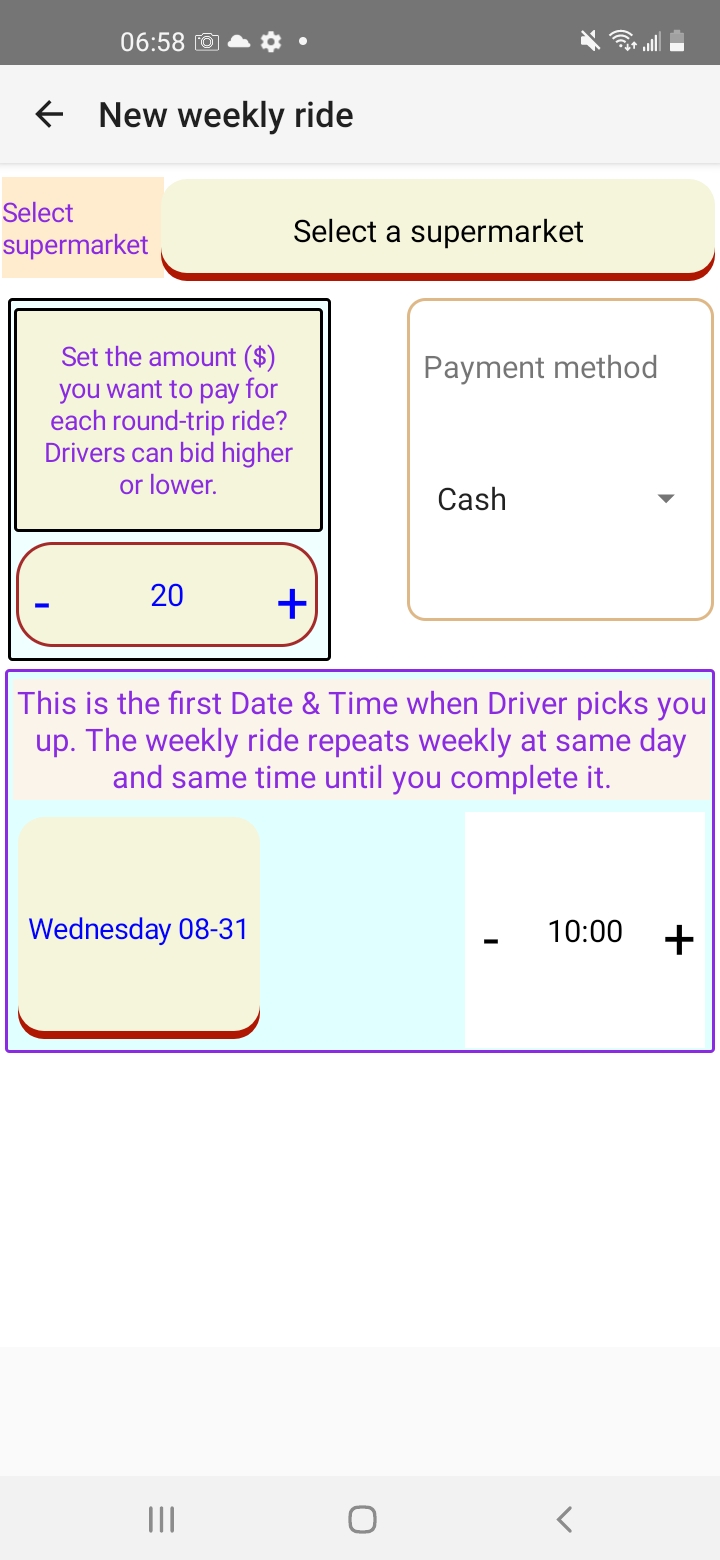
    • Start Date and Time of the first weekly ride. Subsequent rides will take place on the same day of week and at same time.
    • Bidding info: Number of bids you've received so far and the minimum and maximum of the bids.
  2. Ride details. Tap the summary to show the details, if hidden.
    • Supermarket address
      You'll see following additional info once you've accepted a bid
    • Driver's vehicle's license plate number. You should verify this number before stepping into your driver's vehicle, and you have every right to refuse the ride without penalty if the number doesn't match.
    • Driver's email address: This is the gmail address for you to pay your Driver via e-Transfer.
Rider Main page

Ride Menu

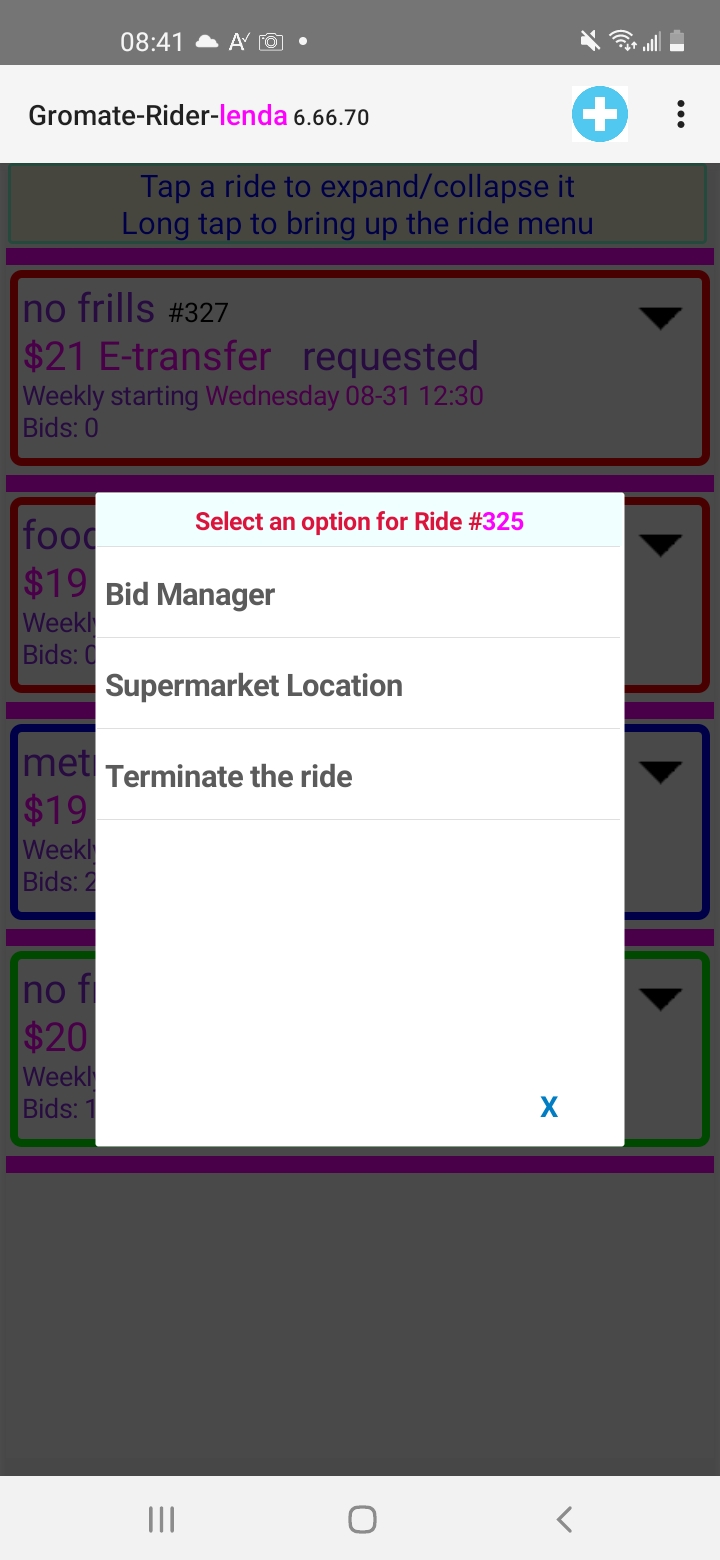
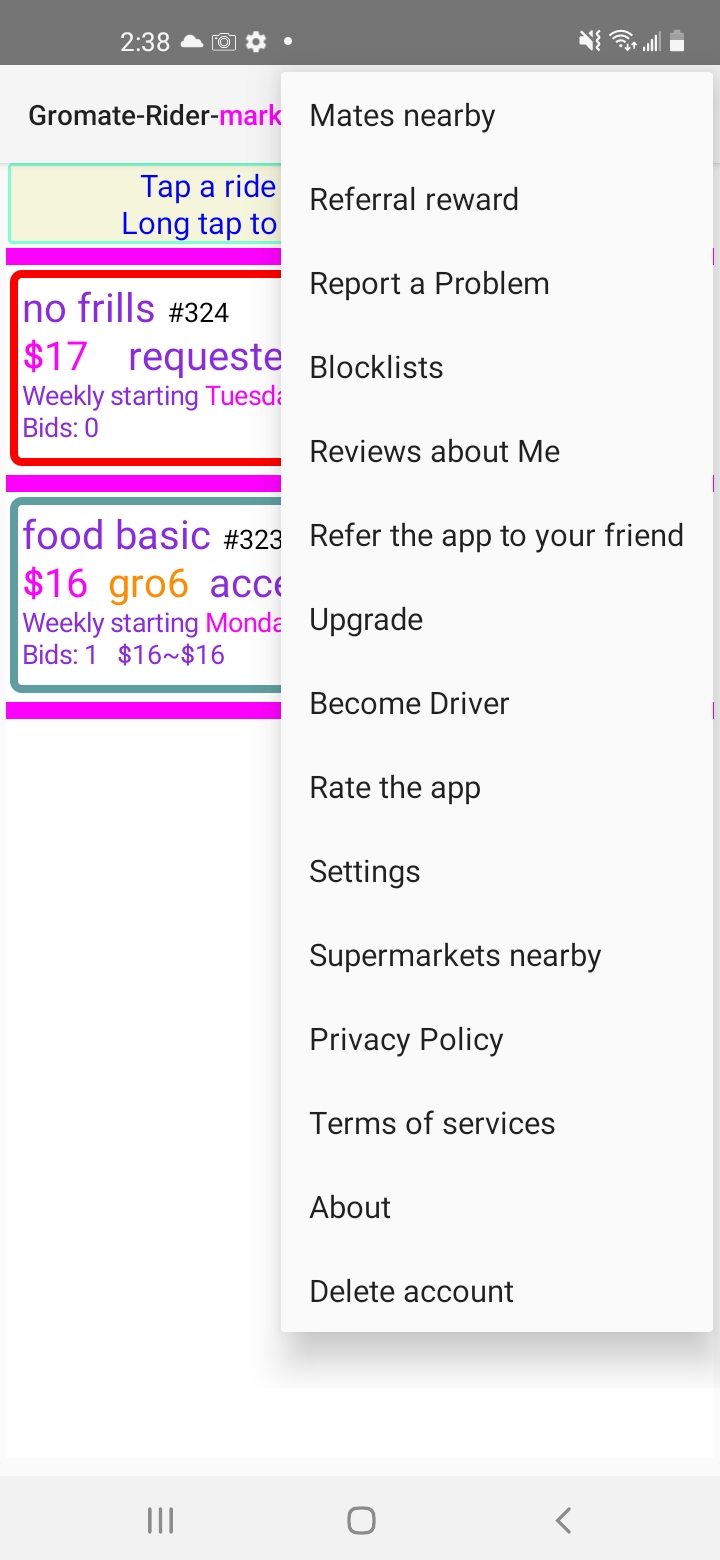
Long tap a ride to see the ride menu.

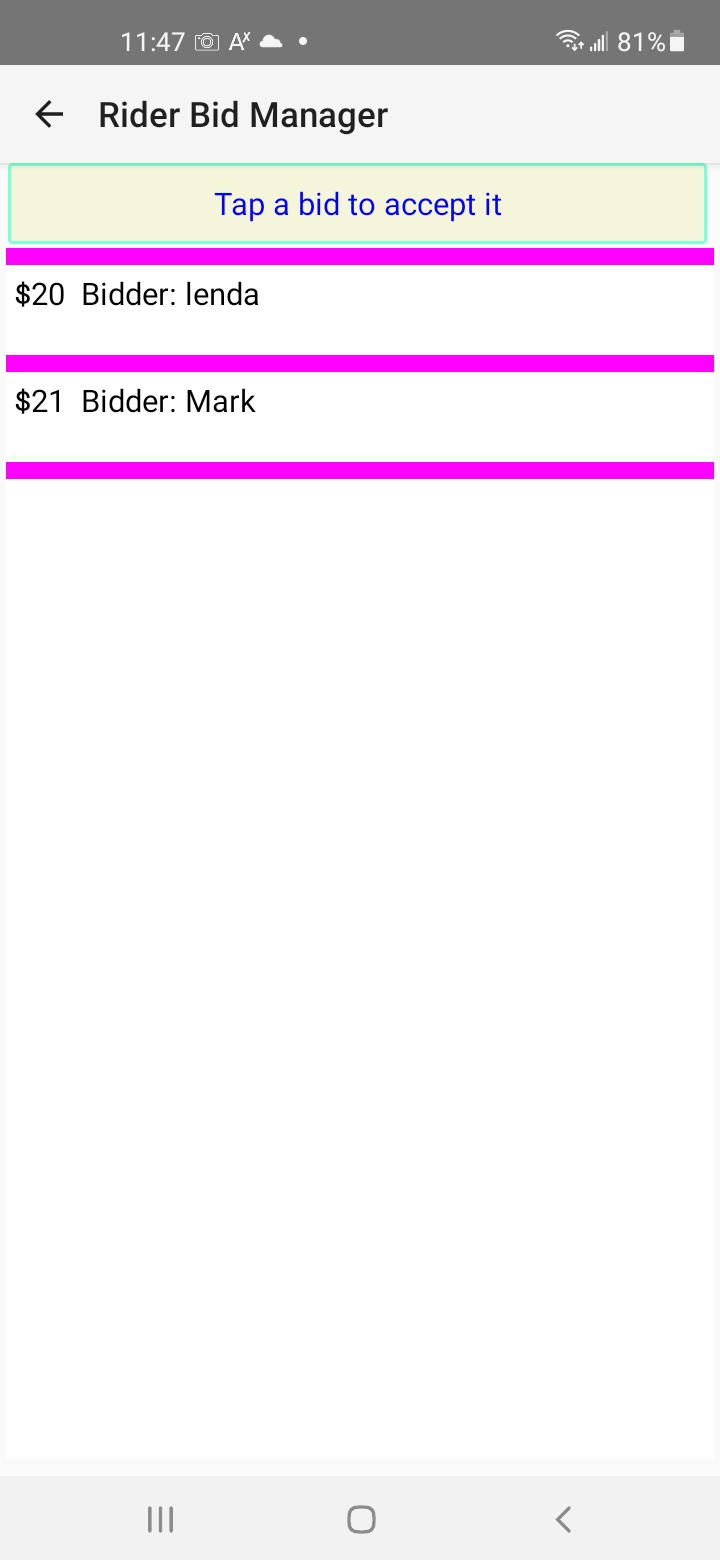
  1. Bid Manager: Once your ride receives one or more bids, you can open up the Bid Manager to accept a bid. The selected bidder will be your Driver.
  2. Supermarket location
  3. Delete: You can delete your ride as long as it hasn't received any bid yet.
  4. Accept: Once your ride has received some bids, you can accept one of them if you wish.
  5. Pause: You can pause an accept ride as long as it's not within 1 hour before the scheduled ride time.
  6. Resume: You can resume a ride paused by you earlier as long as it's not within 1 hour before the scheduled ride time.
  7. Terminate: You can terminate an accepted ride as long as it's not within 1 hour before the scheduled ride time.
  8. Call or text Driver: You can call or text your driver of your accepted rides
  9. Driver no show: When the Driver doesn't come in time, give him/her a call. Once confirmed that the driver is not coming, mark "Driver no show".
  10. Review the Driver: You can rate the Driver of completed rides.
  11. Block the Driver: You can block the Driver of a completed ride. Blocked Drivers can't see your future rides.
ride management

Bid Manager

  1. It shows a list of bids you've received so far.
  2. You decide which bid to accept. The selected bidder will be your Driver.
  3. The ride will enter "Accepted" state once you accept a bid.
ride management


3. New ride


Steps to add a new weekly ride
  1. Tap New ride ("+" sign)
  2. Tap "Select a supermarket" to select an existing supermarket or add a new one. Steps to add a new supermarket:
    1. Tap + sign to bring up the New Supermarket page
    2. Enter supermarket name
    3. Check Other city/town, same state/province if you live near the city/town boundary and it's located in a different city/town than yours.
    4. Check Other state/province if you live near the State/province boundary and it's located in a different state/province than yours.
    5. Supermarkets nearby show nearby supermarkets on Google Maps. Tapping a listing and its address will appear.
    6. Address: Enter the address following the onscreen interactive instruction.
    7. Check the address to make sure that there is no error by tapping the checkmark button.
    8. Tap Save to create the new supermarket, which will take you back to the new ride page.
  3. Your initial offer: This is the amount you're willing to pay for the round-trip ride. Drivers can bid higher or lower than this amount.
  4. Start date time: This is the date and time you want Driver come to pick you up. A 2-hour time slot is reserved for each ride.
  5. Save the new ride: Tap the save button and you'll see the final confirmation. Tap OK to continue or X to cancel.
Rider new ride


Copyright © 2018-2024 deedeegroup©       Privacy Policy       Terms of services